|
Some picture taking tips...Satomi and I aren't expert photographers, but we like taking pictures. She likes flowers and other pretty things, and I prefer capturing things that are odd and unusual. Like most people, we take far too many snapshots, digitally documenting our lives. Through the years we think we've learned a few lessons about picture-taking that we would like to pass along. These are some techniques that work for us. Maybe they will work for you also.
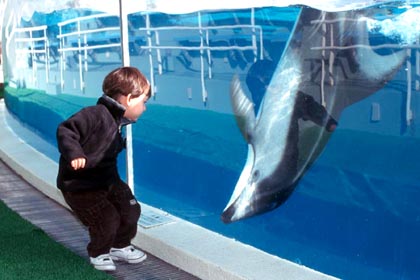
The camera you use is not so importantIn fact, most of the recent pictures from our web sites (apart from Satomi's flower and pottery pictures) come from a camera like this: 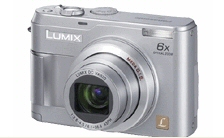 Panasonic Lumix point-and-shoot: cheap, simple and decent quality As of this writing, you can purchase that camera, a Panasonic Lumix DMC-LZ2, for around $150. Five megapixel resolution, decent Leica optics but otherwise nothing fancy. It will fit in your pocket. You can use a more expensive, bigger camera and maybe get better pictures, but you probably won't have that camera with you when you really need it. The best camera is the one you have with you. Clean your lens!This is so fundamentally important, and so easy to forget. You can find pictures here and there on our site in which we failed to do this simple thing, and we see this problem again and again when looking at pictures taken by friends. If you accidentally touch the camera lens with a finger, or there's a piece of dust on it, the resulting blurry smudge can ruin an entire day of photos. And no amount of Photoshop fiddling will bring it back. Check the lens every time you turn on the camera. Find the right lightYour camera breaths light the same way a runner breaths air. More light, better performance. Not enough light, bad pictures. Up to a point, that is. Soft, semi-bright light (like a cloudy-bright day) is best. On sunny days, avoid the middle of the day or find a partly shaded spot. The deck behind our house, partly shaded by a poplar tree, is ideal in the middle of a summer day:  Partial shading is good on a summer day Also, look for that special, warm light that appears briefly in the morning and again in the evening:  Take pictures when the shadows are long and the light is golden Sometimes you can fill in the shadows with a flash when there is harsh mid-day lighting: 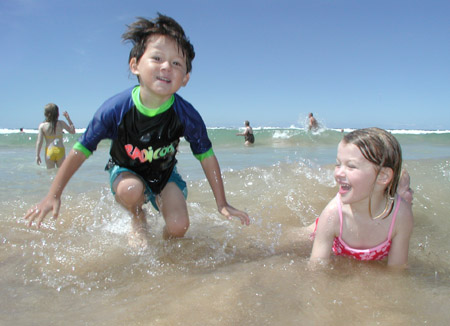 Use flash during the day to offset harsh natural light  Another example of flash used during the day Also, keep in mind that your fancy zoom lens, when zoomed, will severely restrict the amount of light coming in. In fact, if you have a camera with exchangable lenses (we currently don't have one), then you should consider buying an extra lens, one that will let in lots of light and that does not zoom at all. Steady your cameraDigital cameras are great because they are so darn smart. They can figure out all kinds of lighting situations automatically so you really don't have to think too much. If you don't have much light to work with, then the camera will try to compensate with a longer exposure. This is what you want, but only if the extra exposure time won't result in a jiggly, blurry image. (And no, the anti-jiggle features of the newer cameras don't really help that much.) To avoid such things, always find something to support the camera in low light situations. You don't need a tripod; just hold the camera against a tabletop, prop it on the back of a chair, jam it against a rock... Just find something to stop the jiggles and keep it rock-steady when you press the button. If you do that, and you TURN OFF THE AUTOMATIC FLASH, then you can take some amazing pictures: 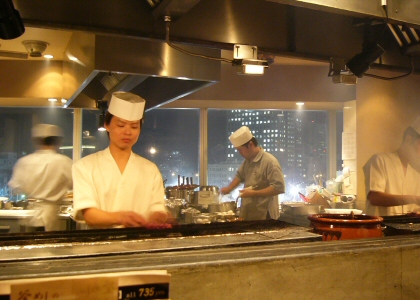 Camera held steady using an inverted rice bowl (or maybe it was a just-emptied sake cup?) 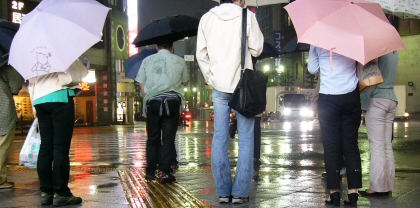 Camera placed on a low windowsill. Picture then cropped for composition In the picture from Yokohama just above, the camera (a simple point-and-shoot I was carrying in my suit pocket) was steadied on a handy knee-high windowsill, under a building overhang. (That picture was also aggressively cropped, something we'll discuss in a moment.) Same idea for this picture from Helsinki in winter, where I used the base of a lamp post: 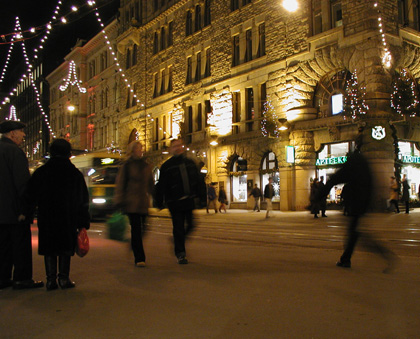 Helsinki on a cold but busy winter evening
Turn off your flash indoorsRegarding flash, use one indoors at your peril. In most cases using a digital camera, and especially one with a built-in flash, you will have better luck without it, if you think a little bit about the room lighting (trust your eyes) and support the camera with something solid.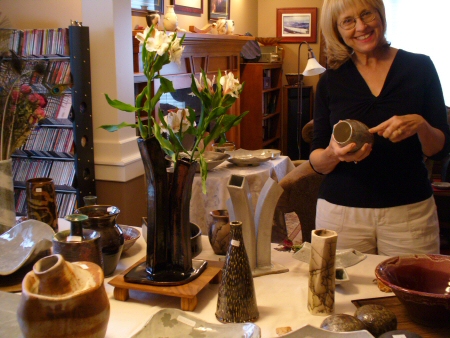 No flash often means nicer lighting That picture of aunt Janet was taken with no flash at all. The built-in flash would have reflected from the pottery and from her glasses and would have created an unnatural-looking light. The trick? In this case a door jamb served as an ad-hoc tripod. When in doubt, take the same picture three times with a flash, and three times without a flash. Delete five of the resulting pictures, saving only the best one. Oh, and if you must use a flash, don't try taking a picture through a window, or of somebody standing in front of one. Seems an obvious thing, but we see people doing this all the time. Think about compositionYou don't need to be an "arteeest" to know a few basic rules. Such as:
   Which of course implies that you should... Take each picture at least three timesFive times is better. Deleting the extras is fast and easy.Crop to improve the compositionNow we're into post-processing. This is what turns a ho-hum snapshot into something worth looking at. And here's the thing: it really doesn't take that much time. Use any tool you like, the free program that came with your camera, or Photoshop, or Paintshop, or whatever. Just get in the habit of always loading your photos into the program, aggressively pruning out (deleting forever) the ones that are no good, and cropping the ones that are worth saving. If in doubt about how much to crop, save the original uncropped version, then crop aggressively to compose the shot. Easily 95% of the photos we take get cropped, sometimes losing half their total image area or more, before being printed or posted.  Crop, crop, crop... Cameron was originally near the center of this picture When cropping, think about placing the subject(s) such that there is movement toward the center. Placing the subjects 1/3 of the way across from the left or right is a good rule of thumb. Look how Julian and Alisa are fighting their way into the picture, against the wind: 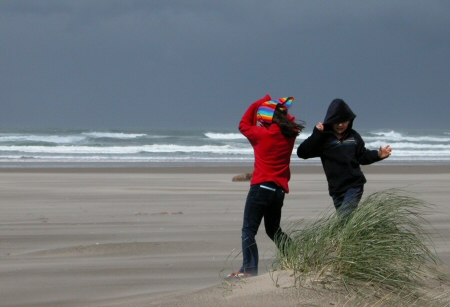 The movement here is toward the center of the picture Also spend a moment to decide of the horizon needs to be leveled (rotated a degree or two) or if the picture would be more fun tilted way over. A tilt of 20 degrees can look fun and intentional; a tilt of a degree or two generally looks like a mistake. Here's an example where tilting worked: 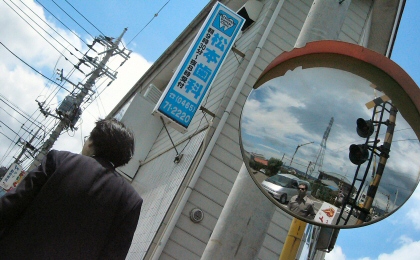 Literally shooting from the hip: I was holding the camera below my waist, in my hand as I walked behind Katsumi. Can you find me in the picture?
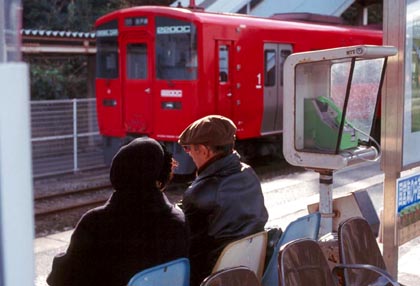
Be careful with image enhancementsHey, I use those tricks a lot... but mostly for the versions of pictures that will be posted online. Before making any radical changes to the color balance, contrast, etc. I always save off the original image, because it's nearly impossible to get back to the original without losing image quality. This is especially true with Satomi's flower pictures, some of which are cropped down and contrast-enhanced to the point where they have become entirely new photos: Before 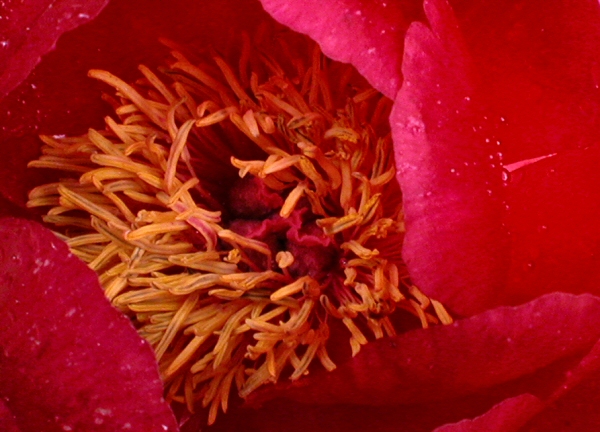 And after Here's an example where I may have gone too far with the contrast. I was trying to bring out the justaposition of the red jacket and the red model airplane. The blues are also nice. This was a cloudy-bright day so the colors were almost (though not quite) this vivid: 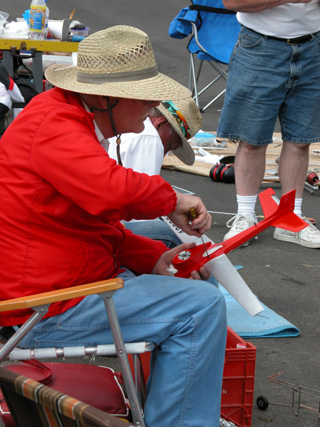 Too much contrast enhancement? Maybe.
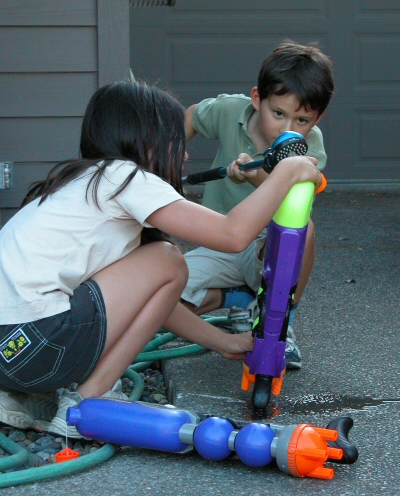
Regarding image quality...If you want print-quality photos, shoot in raw or TIFF uncompressed format, and do any cropping, rotating, enhancing before converting to a compressed format. Save the original unmodified file. Someday you may want all those millions of uncompressed bits.The general steps we useWhen going out someplace, or when traveling, keep a point-and-shoot camera handy, and take snapshots of anything remotely interesting. "Shoot from the hip" if you want the shots to be candid and offbeat: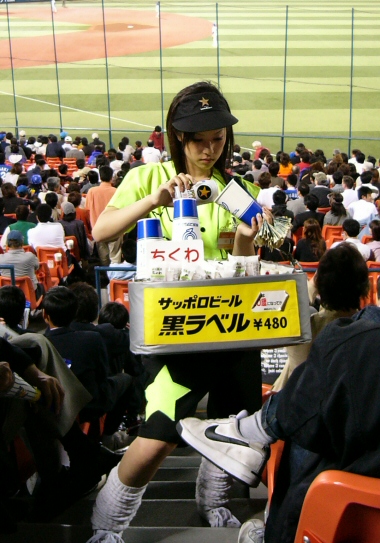 Never mind the baseball, I waited a nearly an hour hoping to get just this shot. Score! 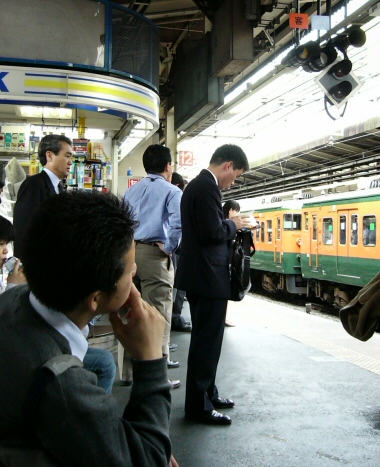 Shot from the hip, then crop, crop, crop... Composition overcomes bad lighting once again. At the end of the day, or the end of the week, or whatever, download the files to your PC. Immediately go through them (I use Windows Explorer's "Preview" feature) and be brutal, deleting the ones that didn't work. I'll delete perhaps 1/2 the pictures the first time through, then maybe another batch of them the second time through. Now, with a manageable number of them, go through and rename the files. Or use directory names, or whatever method helps you to find them later. Having 3000 photos titled "DSC20nnn.JPG" is no fun. The next step is cropping and straightening. Personally I do this for every photo I take: bring them all into your editing software of choice (I use Paintshop PRO) and use your critical eye. Recompose the picture by drawing a crop box and cutting. Try again if that didn't look good. If no version of cropping makes it look good, then just reject the picture (delete it forever). Don't keep boring pictures around that you'll never look at again. If needed, do a rotate before cropping to fix the horizon line. Save the cropped file (overwrite the old one, or save to a new file name if the cropping is aggressive). Now, after cropping, do whatever contrast enhancement, "clarify", smoothing or other operations seem best. But if you do a lot of these, don't overwrite the original file: save it to a new file (e.g. "TheCat_a1.jpg" or something). When doing these operations on a JPG file (not a TIFF or RAW file), remember that every time you save the file you may be losing image quality forever. Be careful. After all the above, but not before, you can resize the image to create web or emailable versions. Be careful not to overwrite the original image with a resized, low-res one. It will be worthless for printing or for future high-res diplays. I use a naming convention (suffix of "xxxx_web_x") to identify the small version of each photo. If you're a geek, you could probably automate some of the above, like the file renaming and the final resizing. I don't automate the resizing because I often crop even more aggressively just before creating the web versions of pictures. As for web versions of the pictures, we currently have two sites: www.rudderpost.com has statically-sized images (typically 450 pixels wide) for use in the blog, while rudderpost.smugmug.com has full-sized images in an image browser, gallery-style. Maintaining both sites is not much work. FTP and "blogger" for the first one, a simple upload page for the second.  Of course, you could also give your camera to a five year old and see what happens (Photo by Julian, Harajuku district of Tokyo, 2001) Have fun!
|